Beveled Ends
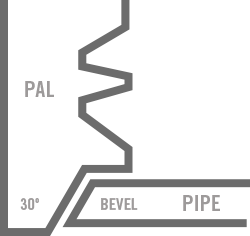
1 After cutting the pipe, check the bevel with the pal.
NOTE: If you see space at the bottom of the pal’s bevel, it means that the pipe’s bevel is steeper, if there’s space on the top, the pipe bevel is longer. Usually 30 to 33 degrees is ideal for welding on the pipeline using the pipeline pal.
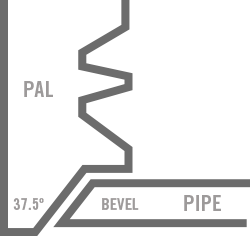
2 After cutting the pipe, check the bevel with the pal.
NOTE: On the building trades pocket pal the 37.5 is usually used for pipe such as chrome. The 35 on the other end of the pal is the degrees of bevel that factory ends are on regular mild steel pipe.
Advanced Cut Line
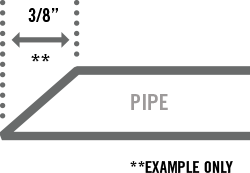
1 Measure bevel on factory end of pipe.
**EXAMPLE ONLY
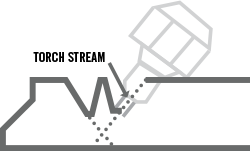
INSIDE STREAM
2 Set torch head at desired 30 or 33 degrees and line it up with advanced cut line off centre of torch stream closest to crawler.
NOTE: Pal can be in front or behind tip. (Example used on pipeline pal)
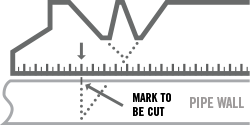
3 When grinding a land on it is usually 1/32 to 1/16. You can take that off your measurement to be exact.
NOTE: Diagram drawn using imperial side of pal. You can use metric side if preferred.
**USED FOR EITHER TOOL **EXAMPLE ONLY
Low Cap
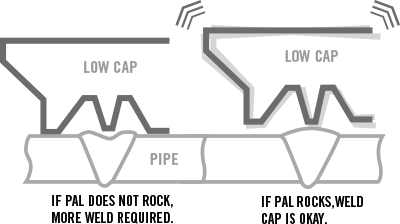
If pal does not rock, more weld required. If pal rocks, weld cap is okay.
NOTE: In Canada, cap height is usually 2.5mm under 10mm pipe wall. For over 10mm pipe wall, it’s 3.5mm.
In US, use imperial side of pal.
High Cap
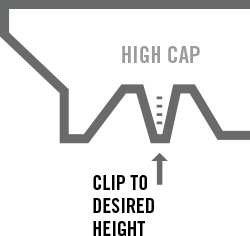
High cap is opposite of low cap. If pal does not move, the weld is okay. If pal rocks, grinding may be required to bring the high cap to desired height.
NOTE: High cap requires modification because of the different cap heights on each job. Snip or grind down to desired height. Don’t forget to file down any sharp edges.
